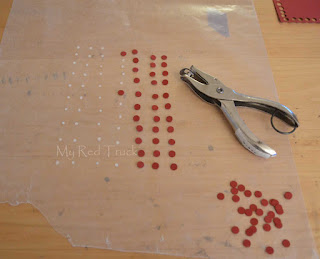
Make your own "Berries" or Candy Dots
I discovered this on Pinterest of course and tried it. My club loved this trick and so do I. This is something you will want to complete before your project. I would suggest at least a day before.
To create these Candy dots:
Wax Paper
Multi-Purpose Liquid Glue
Card Stock in Color of your choice
Hole Punch
Crystal Effects: this is used to create a glossy, lacquered look to items and can also be used to attach heavy embellisments.
To start place dots of glue on your wax paper using the Multi-purpose glue.
I prefer to let this dry a bit however you can proceed to the next step, just be aware you will get glue on your fingers! Have a wipe handy.
The next step is to take your hole punch and start punching out circles out of your chosen card stock. You will then start placing the dots of card stock onto your glue dots on your wax paper.
Now you can understand why you want to do this ahead of time. So turn on your TV or listen to your audiobook and sit down!
After all the dots are down you will need your Crystal Effects.
In a circular motion apply the crystal effects to the surface of your dot.
Now you wait! This takes about an hour to dry and don't panic if it is a bit milky when you first put it on. It will dry clear and very shiny.
I like using these on the Wondrous Wreath stamped image as berries. They are a bit larger than the berry stamp that comes with the set. I am posting a card that I used it on.
Happy Stamping! Oh and if you have questions or need advice on this process please email me!


No comments:
Post a Comment